
Nine Reasons to Put Your Mac’s Pointer in a Corner
If your Mac is like ours, it’s a busy place, with oodles of open windows and lots of icons lying around. If you want to display the Desktop or see a single app’s windows, you may find yourself clicking around or using keyboard shortcuts, but did you know that you can access many of the Mac’s special views with just a flick of your wrist—no click necessary?
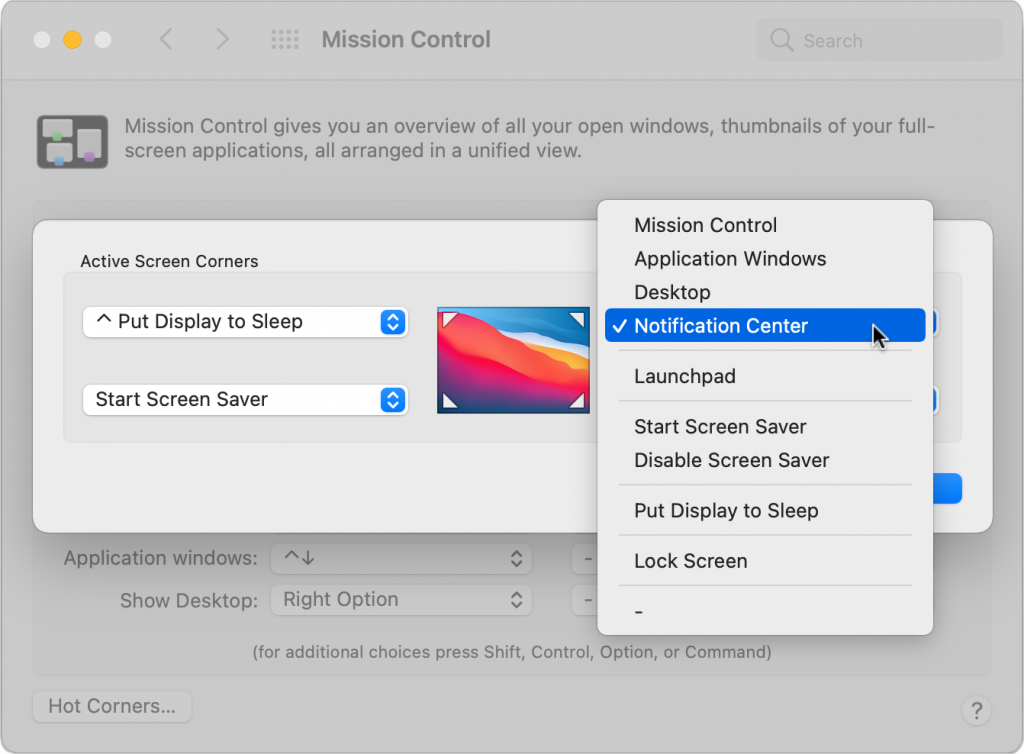
A long-standing but little-known feature called Hot Corners makes this possible. The key to unlocking Hot Corners is in System Preferences, in either the Desktop & Screen Saver or Mission Control pane. In either one, click the Hot Corners button to set up your hot corners.
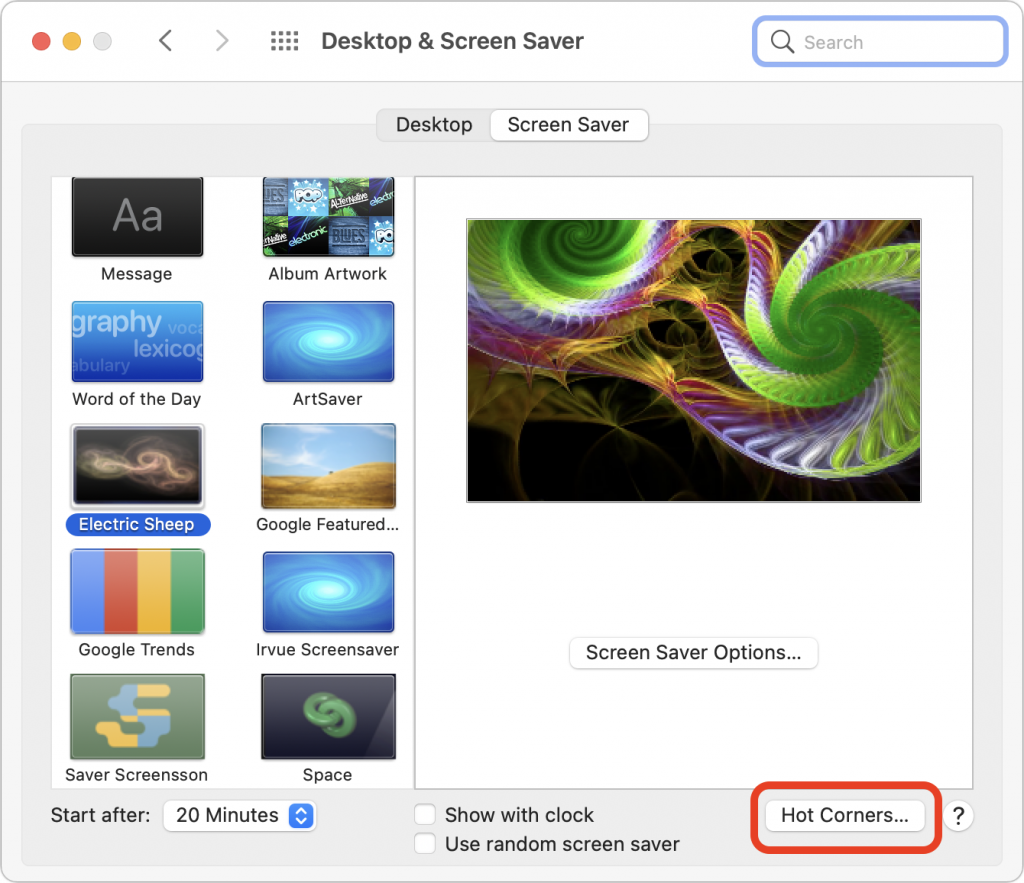
The Hot Corners dialog displays a pop-up menu for each of the four corners of your screen. Choose an action in one of those menus, and that’s what happens when you move your pointer to that corner. A hyphen, the default, means nothing happens.
Here’s the scoop on each action. To exit these special views, switch to another app, press the Escape key, put the pointer back in the hot corner again, or just move the mouse.
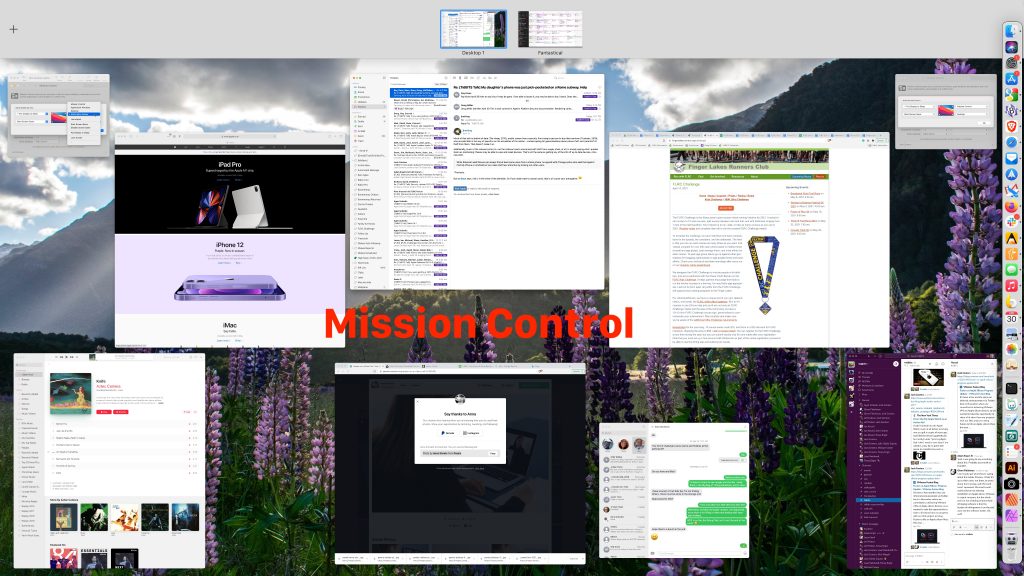
Mission Control
Use a hot corner to enter this bird’s-eye view of all your Mac’s open windows. Once you’re in Mission Control, you can switch to any window by clicking it. (Preview a window by hovering over it and pressing the Space bar.) You can also set up spaces in Mission Control—a space is a view that contains only windows from the apps assigned to that space. Click the plus sign in the top-left corner and then drag windows up into the new space. Switch to a space by clicking it in the top bar.
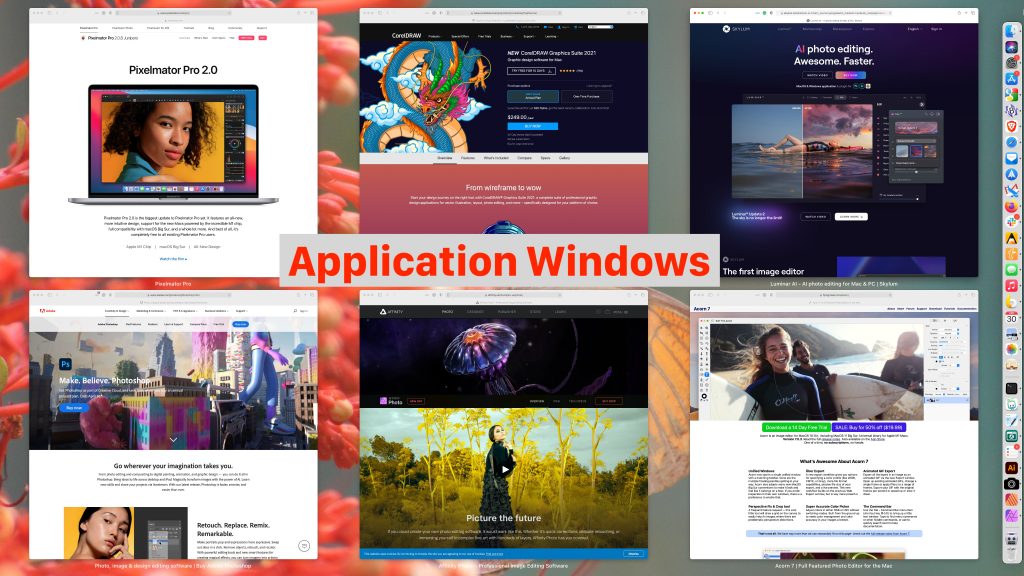
Application Windows
For an overview of all open windows for a particular app (Safari, in this case), use a hot corner to invoke Application Windows. This view displays thumbnails of all open windows in the current app. For some apps, like Pages, you’ll also see thumbnails of recently opened documents at the bottom of the view. Click any thumbnail to switch to it.
Desktop
If you like storing documents for in-progress projects on your Desktop, you’ll love the hot corner that invokes Desktop view. It moves all open windows aside, letting you focus on the icons on the Desktop. The windows return when you switch to an app.
Notification Center
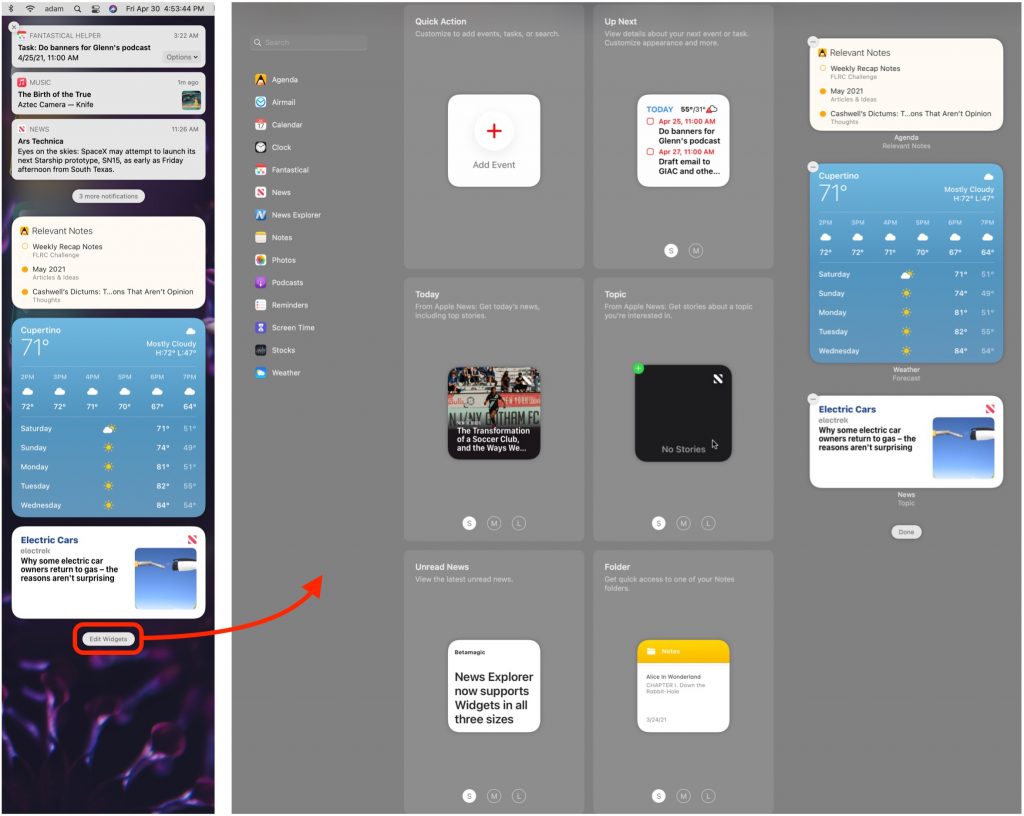
Since you can so easily open Notification Center by clicking the date and time (in macOS 11 Big Sur; in earlier versions of macOS, click the Notification Center icon) in the upper-right corner of your menu bar, it may not be worth wasting a hot corner on it. In Big Sur, Notification Center combines the Today and Notifications views from previous versions of macOS, with iOS-like widgets underneath the most recent notifications. You can control which apps can display notifications in System Preferences > Notifications. To add, remove, or rearrange widgets, click the Edit Widgets button at the bottom of Notification Center.
Start Screen Saver
Screen savers are more than just eye-candy you can use to personalize your Mac—they also serve to conceal the contents of your screen from people who might walk by when you’re not there. The Start Screen Saver hot corner shows the screen saver immediately, overriding the setting for how long the Mac must sit idle before the screen saver turns on (in System Preferences > Desktop & Screen Saver > Screen Saver). It’s helpful if you’re working on something sensitive that you don’t want anyone to see, but you need to leave your desk to chat with a co-worker or use the bathroom. Depending on your setting for “Require password after sleep or screen saver begins” in System Preferences > Security & Privacy > General, you may have to enter your password to turn off the screen saver.
Disable Screen Saver
If you usually have your screen saver set to turn on automatically after just a minute or two, it may come on when you would prefer it didn’t. This could happen, for example, while you are pondering a complex idea or thinking about what to write. To disable the screen saver temporarily, use a Disable Screen Saver hot corner.
Launchpad
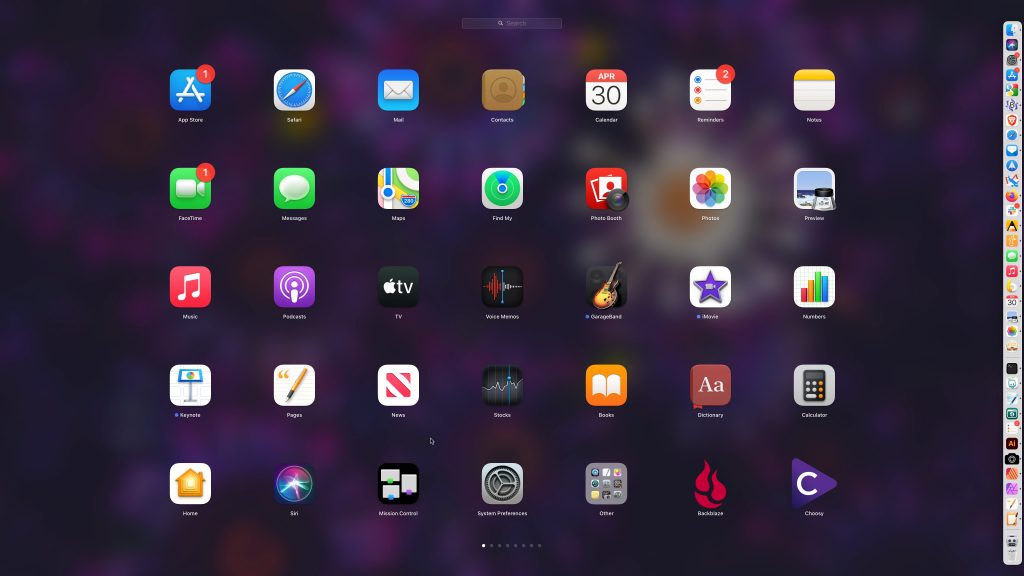
If you like using iOS, giving Launchpad a hot corner might make opening apps on your Mac easier. Apple designed Launchpad to look and work like the Home screen on an iPad or iPhone—just click an app to launch it. To see more apps, scroll horizontally—with a trackpad, swipe with two fingers; with an Apple Magic Mouse, swipe with one finger on the mouse surface. Just like in iOS, you can drag the apps around to put them in the order that works best for you.
Put Display to Sleep
Those who are concerned about energy usage might like this option. Toss your pointer in the associated hot corner, and your screen goes to sleep immediately, consuming less power than a screen saver. It lets you override the “Turn display off after” slider in System Preferences > Energy Saver. As with the screen saver, you may have to enter your password to wake the display when you come back.
Lock Screen
The Lock Screen option has roughly the same effect as Start Screen Saver and Put Display to Sleep in that it instantly displays the Mac’s login screen, preventing anyone from seeing what’s on your Desktop and requiring your password again.
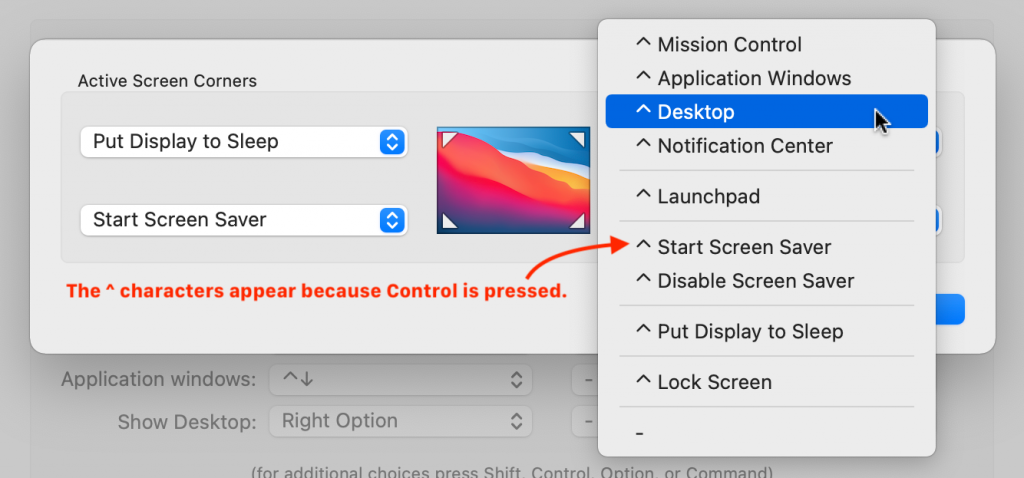
Add Modifier Keys
If you find yourself triggering a hot corner accidentally, try adding a modifier key so its action activates only when the pointer is in the corner and the key is pressed. To set this up, open the Hot Corners dialog, open the corner’s pop-up menu, and press a key (Shift, Control, Option, or Command). The key’s symbol appears in the menu. Keep the key down and choose the desired action.
The best way to set up your hot corners depends on how you use your Mac, of course. Our favorites are Start Screen Saver because it’s a quick override of the screen saver settings and Desktop because it removes screen clutter that gets in the way of using the Desktop.
(Featured image by Norbert Levajsics on Unsplash)